> ## Documentation Index
> Fetch the complete documentation index at: https://docs.liquid.ai/llms.txt
> Use this file to discover all available pages before exploring further.
# Fine-tuning LFM for a local Home Assistant
Browse the complete example on GitHub
A step by step guide on building a home assistant system powered entirely by a local LFM model. Every stage of the journey is covered, from a first working prototype to a fine-tuned model for tool calling running fully on your own hardware.
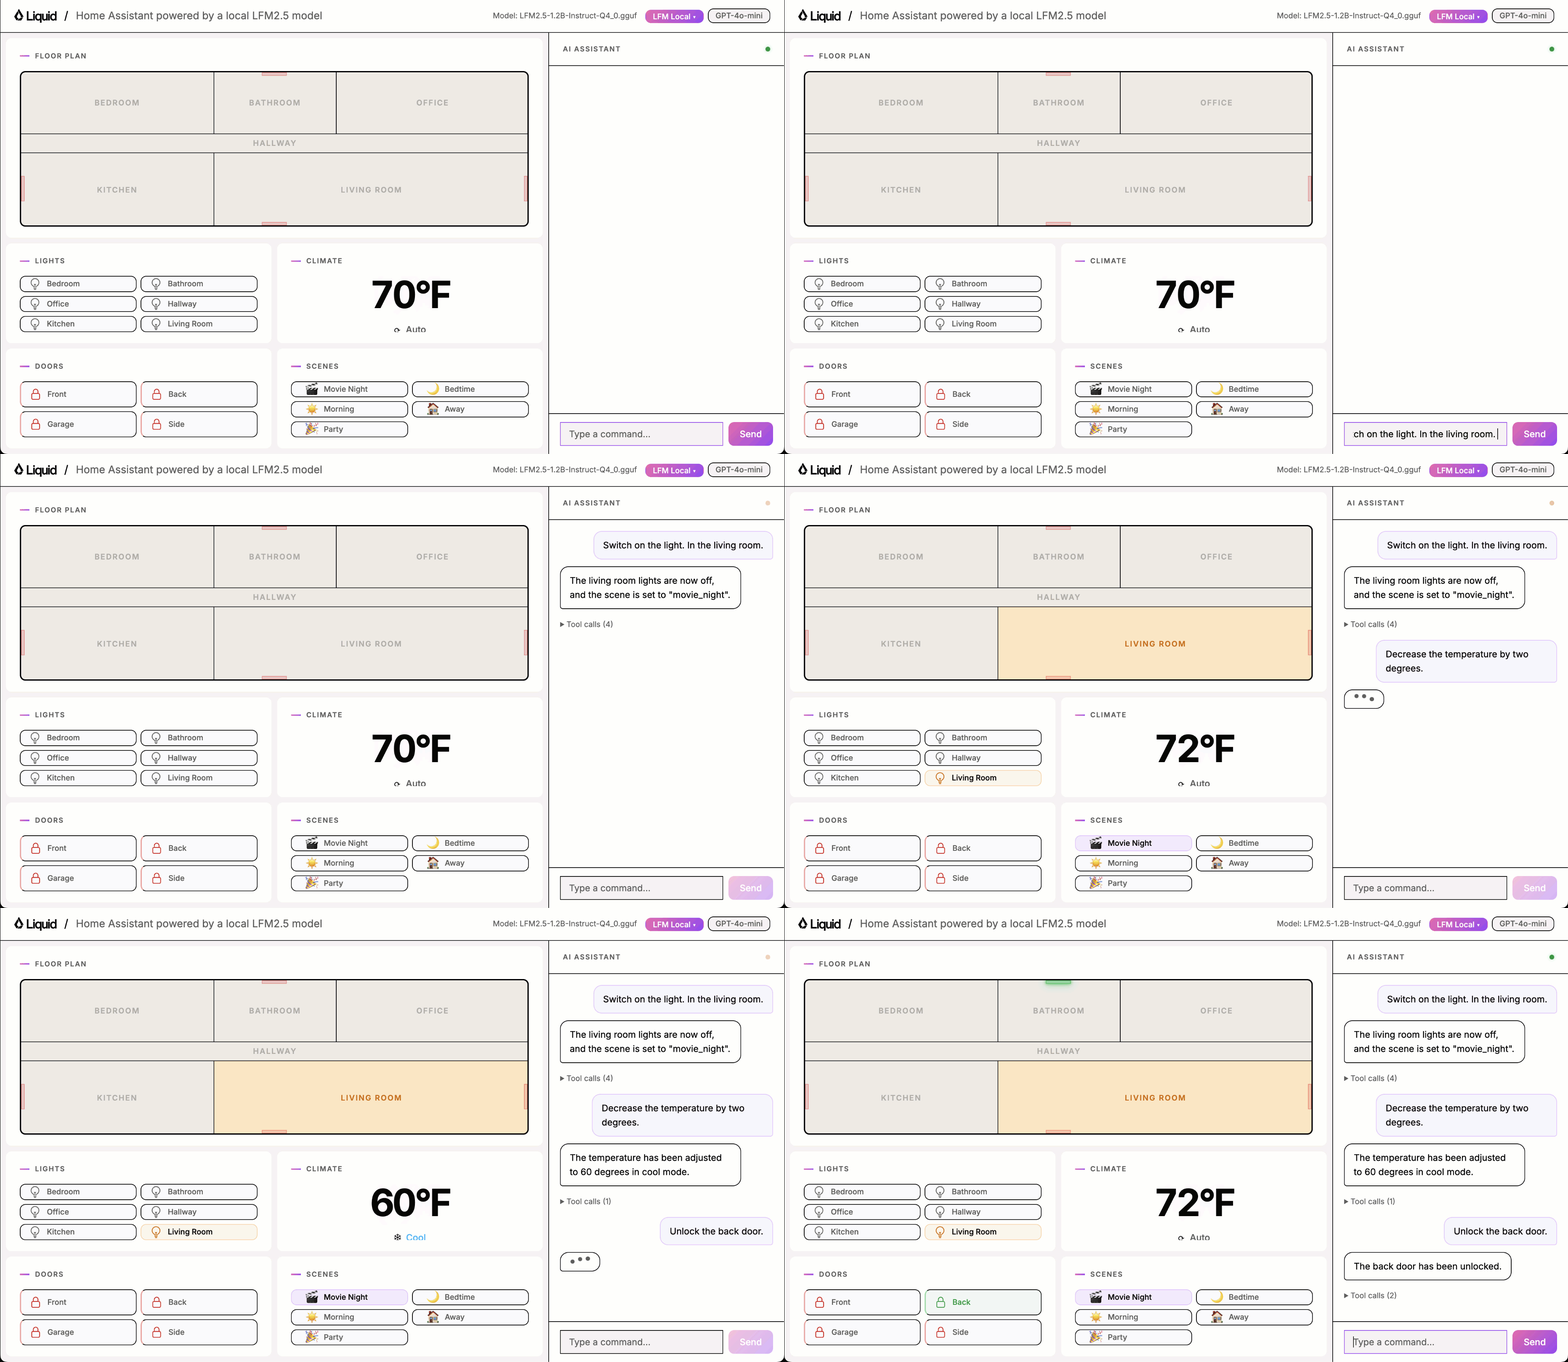 ## This is what you will learn
In this example, you will learn how to:
1. Build a proof of concept for a fully local Home Assistant.
2. Benchmark its tool-calling accuracy so you have a clear baseline to improve on.
3. Generate synthetic data for model fine-tuning.
4. Fine-tune the model on this synthetic data to maximise accuracy using serverless GPUs by Modal.
5. Deploy the fine-tuned model in the app.
## Quickstart
**Requirements**
* [uv](https://docs.astral.sh/uv/getting-started/installation/) for running the Python app
* [llama.cpp](https://github.com/ggerganov/llama.cpp?tab=readme-ov-file#installation) for running the model locally (`llama-server` must be on your PATH)
### 1. Clone the repository
```bash theme={"theme":{"light":"github-light","dark":"github-dark"}}
git clone https://github.com/Liquid4All/cookbook.git
cd cookbook/examples/home-assistant
```
### 2. Start the app server
```bash theme={"theme":{"light":"github-light","dark":"github-dark"}}
uv run uvicorn app.server:app --port 5173 --reload
```
### 3. Open the app
```bash theme={"theme":{"light":"github-light","dark":"github-dark"}}
open http://localhost:5173
```
The UI includes a model selector. When you pick a model, the app automatically downloads and starts `llama-server` in the background. No manual model server setup is needed.
## Environment setup
You will need
* [uv](https://docs.astral.sh/uv/) to manage Python dependencies and run the application efficiently without creating virtual environments manually.
* [llama.cpp](https://github.com/ggerganov/llama.cpp) to run the LFM model locally. The `llama-server` binary must be on your PATH.
* [Modal](https://modal.com/) for GPU cloud compute when fine-tuning.
* [Weights & Biases](https://wandb.ai/) (optional) for experiment tracking during fine-tuning.
Let's go one by one.
### Install uv
**macOS/Linux:**
```bash theme={"theme":{"light":"github-light","dark":"github-dark"}}
curl -LsSf https://astral.sh/uv/install.sh | sh
```
**Windows:**
```
powershell -ExecutionPolicy ByPass -c "irm https://astral.sh/uv/install.ps1 | iex"
```
### Install llama.cpp
Follow the [official installation guide](https://github.com/ggerganov/llama.cpp?tab=readme-ov-file#installation) for your platform.
After installation, confirm `llama-server` is available on your PATH:
```bash theme={"theme":{"light":"github-light","dark":"github-dark"}}
llama-server --version
```
### Modal setup
1. Create an account at [modal.com](https://modal.com/)
2. Install the Modal Python package inside your virtual environment:
```bash theme={"theme":{"light":"github-light","dark":"github-dark"}}
uv add modal
```
3. Authenticate with Modal:
```bash theme={"theme":{"light":"github-light","dark":"github-dark"}}
uv run modal setup
```
### Weights & Biases setup
1. Create an account at [wandb.ai](https://wandb.ai/)
2. Install the Weights & Biases Python package:
```bash theme={"theme":{"light":"github-light","dark":"github-dark"}}
uv add wandb
```
3. Authenticate:
```bash theme={"theme":{"light":"github-light","dark":"github-dark"}}
uv run wandb login
```
Once all tools are installed, sync the project dependencies:
```bash theme={"theme":{"light":"github-light","dark":"github-dark"}}
uv sync
```
## Step 1: Build a proof of concept
The main components of the solution are:
* **Browser** renders the UI and sends chat messages to the server.
* **FastAPI server** handles HTTP requests, manages home state, and starts the llama.cpp server on model selection.
* **Agent loop** drives the conversation, calls the model for inference, and dispatches tool calls.
* **Tools** read and mutate the home state (lights, thermostat, doors, scenes).
* **llama.cpp server** runs the LFM model locally and exposes an OpenAI-compatible API.
```mermaid theme={"theme":{"light":"github-light","dark":"github-dark"}}
graph LR
Browser <-->|chat / state| FastAPI[FastAPI server]
FastAPI -->|start process| LFM[llama.cpp server]
FastAPI -->|run| Agent[Agent loop]
Agent <-->|inference| LFM
Agent <-->|execute| Tools
```
The brain of the system is a small language model that maps English sentences to the right tool calls:
* `toggle_lights`: turn lights on or off in a specific room
* `set_thermostat`: change the temperature and operating mode
* `lock_door`: lock or unlock a door
* `get_device_status`: read the current state of any device
* `set_scene`: activate a preset that adjusts multiple devices at once
* `intent_unclear`: the most important tool for robustness. The model must call it whenever the request is ambiguous, off-topic, incomplete, or refers to an unsupported device. Getting this tool right is what separates a reliable assistant from one that hallucinates actions.
The sequence diagram below shows how the system starts and processes a chat message step by step:
```mermaid theme={"theme":{"light":"github-light","dark":"github-dark"}}
sequenceDiagram
participant Browser
participant FastAPI as FastAPI server
participant Agent as Agent loop
participant Tools
participant LFM as llama.cpp server
Note over Browser,LFM: Startup
Browser->>FastAPI: select model
FastAPI->>LFM: start process (background thread)
LFM-->>FastAPI: ready
Note over Browser,LFM: Chat request
Browser->>FastAPI: POST /chat
FastAPI->>Agent: run(message, history)
Agent->>LFM: inference request (with tool schemas)
LFM-->>Agent: tool call
Agent->>Tools: execute tool
Tools-->>Agent: result
Agent->>LFM: inference request (with tool result)
LFM-->>Agent: text response
Agent-->>FastAPI: text response
FastAPI-->>Browser: text response
Browser->>FastAPI: GET /state
FastAPI-->>Browser: updated home state
```
## Step 2: Benchmark tool-calling accuracy
Play with the UI using one of the local models and you will quickly notice it sometimes works and sometimes it doesn't.
## This is what you will learn
In this example, you will learn how to:
1. Build a proof of concept for a fully local Home Assistant.
2. Benchmark its tool-calling accuracy so you have a clear baseline to improve on.
3. Generate synthetic data for model fine-tuning.
4. Fine-tune the model on this synthetic data to maximise accuracy using serverless GPUs by Modal.
5. Deploy the fine-tuned model in the app.
## Quickstart
**Requirements**
* [uv](https://docs.astral.sh/uv/getting-started/installation/) for running the Python app
* [llama.cpp](https://github.com/ggerganov/llama.cpp?tab=readme-ov-file#installation) for running the model locally (`llama-server` must be on your PATH)
### 1. Clone the repository
```bash theme={"theme":{"light":"github-light","dark":"github-dark"}}
git clone https://github.com/Liquid4All/cookbook.git
cd cookbook/examples/home-assistant
```
### 2. Start the app server
```bash theme={"theme":{"light":"github-light","dark":"github-dark"}}
uv run uvicorn app.server:app --port 5173 --reload
```
### 3. Open the app
```bash theme={"theme":{"light":"github-light","dark":"github-dark"}}
open http://localhost:5173
```
The UI includes a model selector. When you pick a model, the app automatically downloads and starts `llama-server` in the background. No manual model server setup is needed.
## Environment setup
You will need
* [uv](https://docs.astral.sh/uv/) to manage Python dependencies and run the application efficiently without creating virtual environments manually.
* [llama.cpp](https://github.com/ggerganov/llama.cpp) to run the LFM model locally. The `llama-server` binary must be on your PATH.
* [Modal](https://modal.com/) for GPU cloud compute when fine-tuning.
* [Weights & Biases](https://wandb.ai/) (optional) for experiment tracking during fine-tuning.
Let's go one by one.
### Install uv
**macOS/Linux:**
```bash theme={"theme":{"light":"github-light","dark":"github-dark"}}
curl -LsSf https://astral.sh/uv/install.sh | sh
```
**Windows:**
```
powershell -ExecutionPolicy ByPass -c "irm https://astral.sh/uv/install.ps1 | iex"
```
### Install llama.cpp
Follow the [official installation guide](https://github.com/ggerganov/llama.cpp?tab=readme-ov-file#installation) for your platform.
After installation, confirm `llama-server` is available on your PATH:
```bash theme={"theme":{"light":"github-light","dark":"github-dark"}}
llama-server --version
```
### Modal setup
1. Create an account at [modal.com](https://modal.com/)
2. Install the Modal Python package inside your virtual environment:
```bash theme={"theme":{"light":"github-light","dark":"github-dark"}}
uv add modal
```
3. Authenticate with Modal:
```bash theme={"theme":{"light":"github-light","dark":"github-dark"}}
uv run modal setup
```
### Weights & Biases setup
1. Create an account at [wandb.ai](https://wandb.ai/)
2. Install the Weights & Biases Python package:
```bash theme={"theme":{"light":"github-light","dark":"github-dark"}}
uv add wandb
```
3. Authenticate:
```bash theme={"theme":{"light":"github-light","dark":"github-dark"}}
uv run wandb login
```
Once all tools are installed, sync the project dependencies:
```bash theme={"theme":{"light":"github-light","dark":"github-dark"}}
uv sync
```
## Step 1: Build a proof of concept
The main components of the solution are:
* **Browser** renders the UI and sends chat messages to the server.
* **FastAPI server** handles HTTP requests, manages home state, and starts the llama.cpp server on model selection.
* **Agent loop** drives the conversation, calls the model for inference, and dispatches tool calls.
* **Tools** read and mutate the home state (lights, thermostat, doors, scenes).
* **llama.cpp server** runs the LFM model locally and exposes an OpenAI-compatible API.
```mermaid theme={"theme":{"light":"github-light","dark":"github-dark"}}
graph LR
Browser <-->|chat / state| FastAPI[FastAPI server]
FastAPI -->|start process| LFM[llama.cpp server]
FastAPI -->|run| Agent[Agent loop]
Agent <-->|inference| LFM
Agent <-->|execute| Tools
```
The brain of the system is a small language model that maps English sentences to the right tool calls:
* `toggle_lights`: turn lights on or off in a specific room
* `set_thermostat`: change the temperature and operating mode
* `lock_door`: lock or unlock a door
* `get_device_status`: read the current state of any device
* `set_scene`: activate a preset that adjusts multiple devices at once
* `intent_unclear`: the most important tool for robustness. The model must call it whenever the request is ambiguous, off-topic, incomplete, or refers to an unsupported device. Getting this tool right is what separates a reliable assistant from one that hallucinates actions.
The sequence diagram below shows how the system starts and processes a chat message step by step:
```mermaid theme={"theme":{"light":"github-light","dark":"github-dark"}}
sequenceDiagram
participant Browser
participant FastAPI as FastAPI server
participant Agent as Agent loop
participant Tools
participant LFM as llama.cpp server
Note over Browser,LFM: Startup
Browser->>FastAPI: select model
FastAPI->>LFM: start process (background thread)
LFM-->>FastAPI: ready
Note over Browser,LFM: Chat request
Browser->>FastAPI: POST /chat
FastAPI->>Agent: run(message, history)
Agent->>LFM: inference request (with tool schemas)
LFM-->>Agent: tool call
Agent->>Tools: execute tool
Tools-->>Agent: result
Agent->>LFM: inference request (with tool result)
LFM-->>Agent: text response
Agent-->>FastAPI: text response
FastAPI-->>Browser: text response
Browser->>FastAPI: GET /state
FastAPI-->>Browser: updated home state
```
## Step 2: Benchmark tool-calling accuracy
Play with the UI using one of the local models and you will quickly notice it sometimes works and sometimes it doesn't.
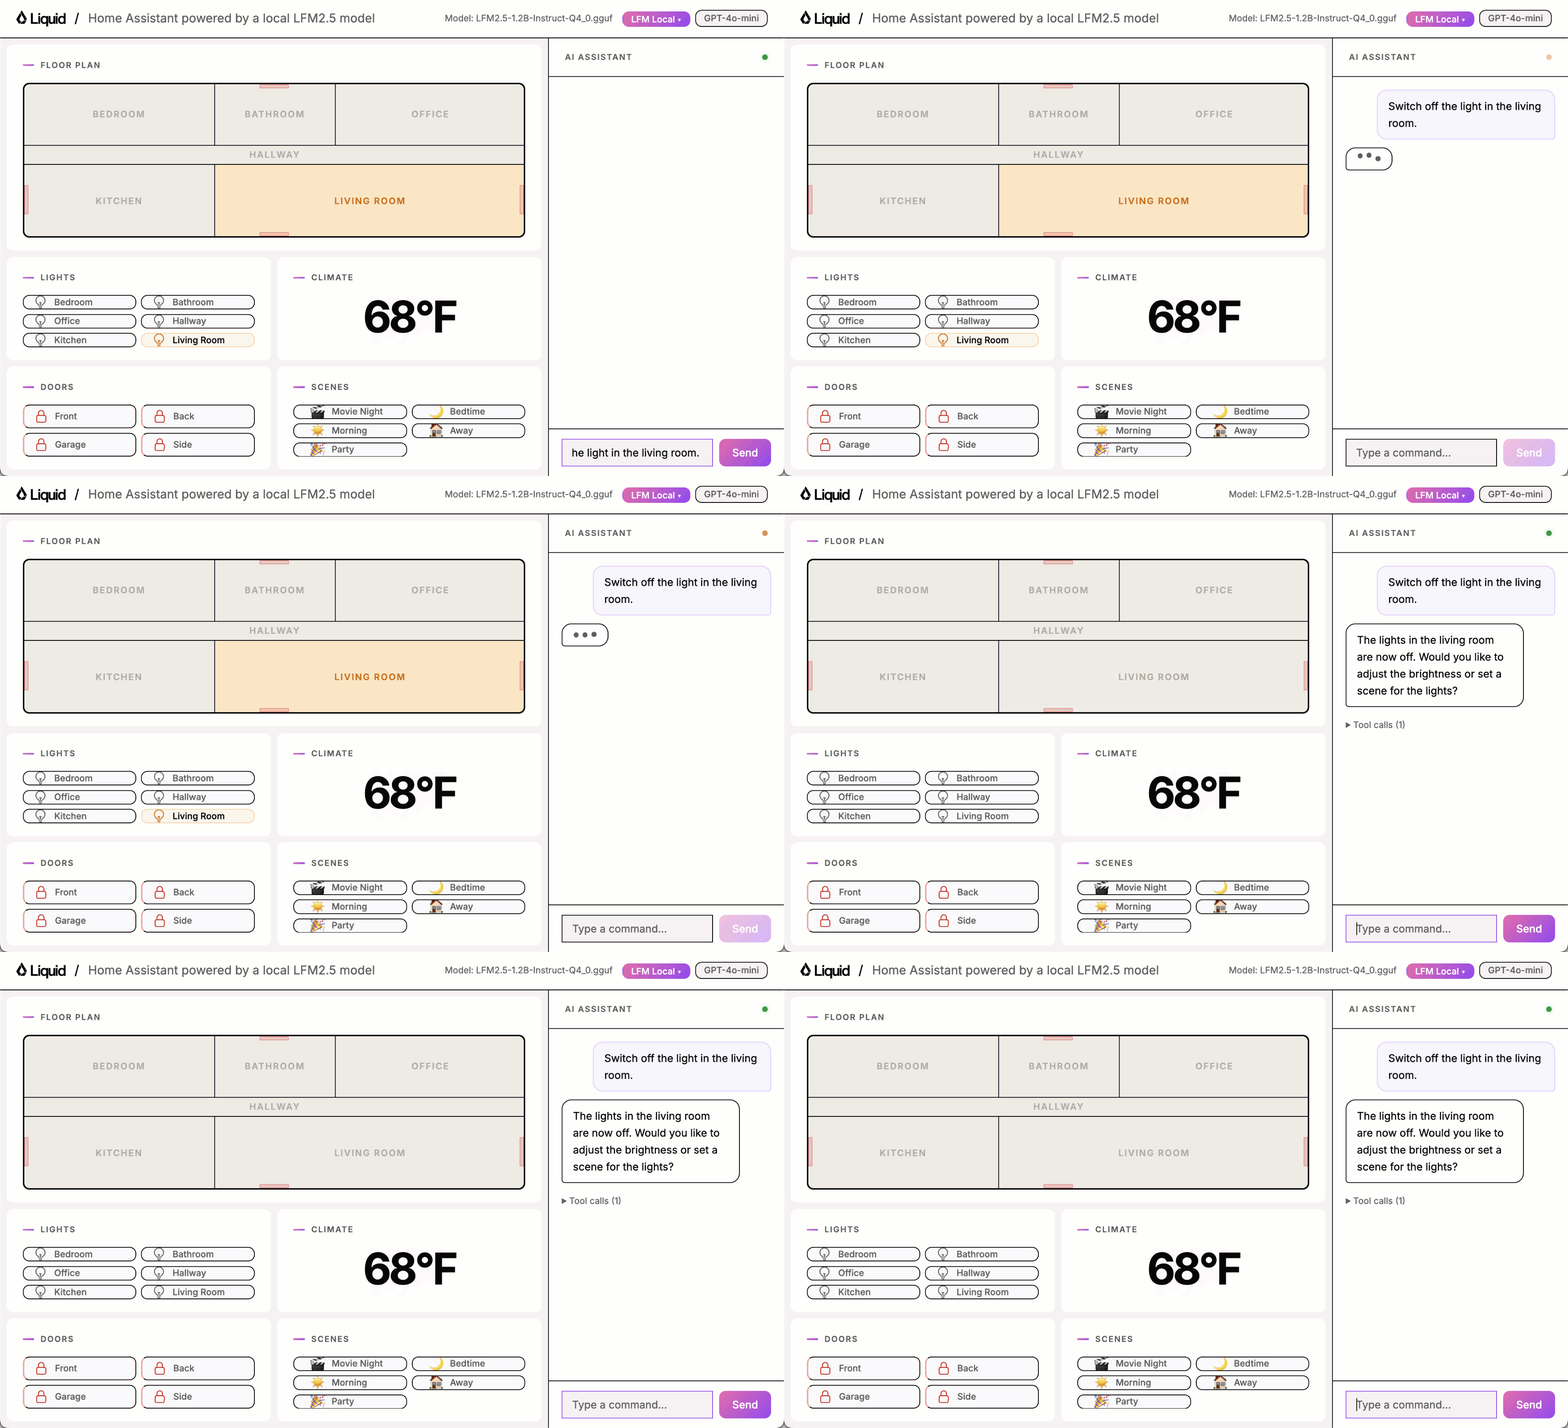
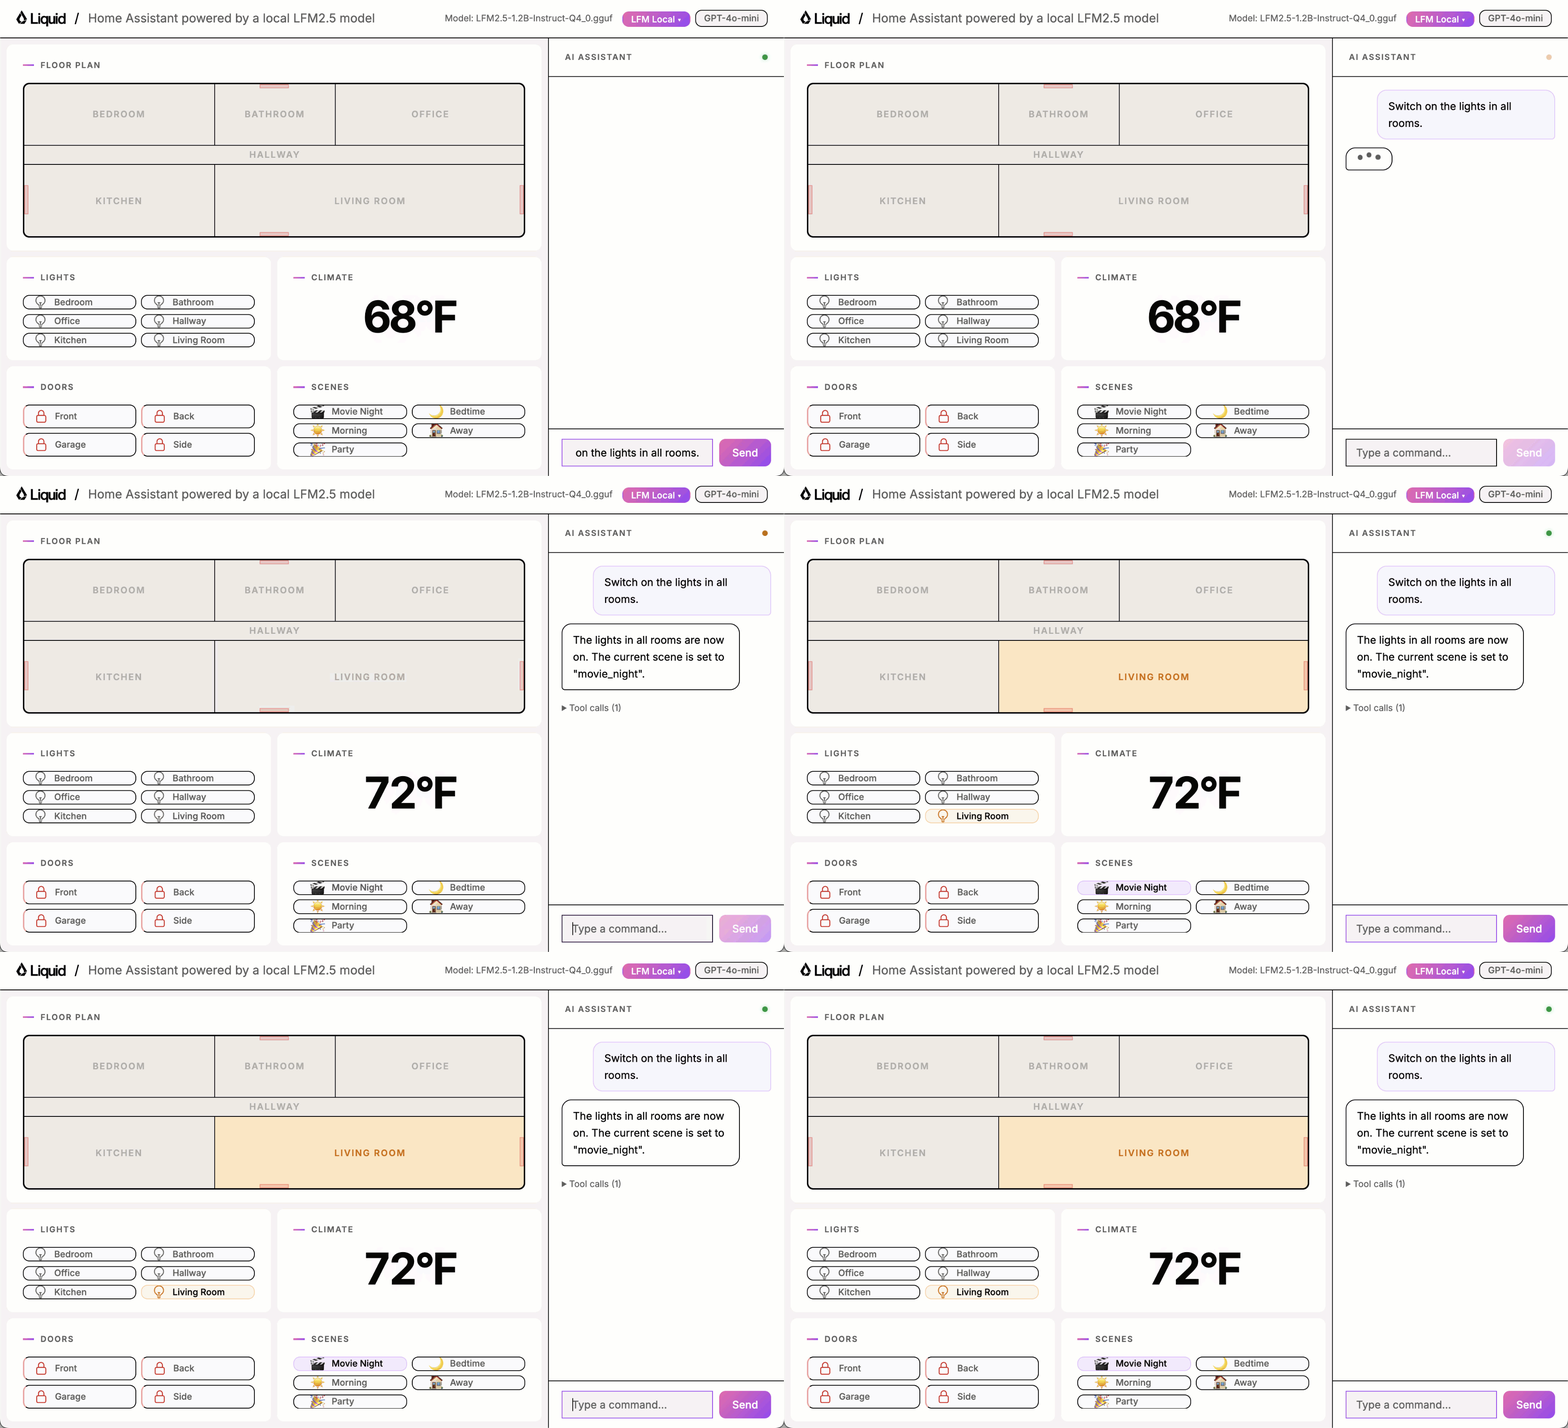 That is fine for a proof of concept. But the full power of small language models only comes out when you fine-tune them. Before you fine-tune, though, you need to know where you stand. You need to measure.
### Building a good benchmark
A good benchmark covers the space of possible inputs by systematic taxonomy, not intuition. The `benchmark/` directory contains a 100-task suite built around three dimensions:
| Dimension | Values |
| --------------- | ----------------------------------------------------------------------------- |
| Capability | `lights`, `thermostat`, `doors`, `status`, `scene`, `rejection`, `multi_tool` |
| Phrasing | `imperative`, `colloquial`, `implicit`, `question` |
| Inference depth | `literal`, `semantic`, `boundary` |
The Cartesian product of those dimensions defines the universe of task types. At least one task is sampled per non-empty cell, forcing prompts you would not have thought of otherwise.
Every task has a pure Python verifier that inspects the final `home_state` dict or captured `tool_calls`. No LLM-as-judge. Deterministic, fast, cheap.
```python theme={"theme":{"light":"github-light","dark":"github-dark"}}
# State check: was the right final state reached?
passed = state["lights"]["kitchen"]["state"] == "on"
# Tool-call check (for status queries and rejections)
call = _find_last_call(tool_calls, "intent_unclear")
passed = call is not None and call["args"].get("reason") == "off_topic"
```
### Running the benchmark
```bash theme={"theme":{"light":"github-light","dark":"github-dark"}}
uv run python benchmark/run.py \
--hf-repo LiquidAI/LFM2.5-1.2B-Instruct-GGUF \
--hf-file LFM2.5-1.2B-Instruct-Q4_0.gguf
```
Run a single task by number (1-101):
```bash theme={"theme":{"light":"github-light","dark":"github-dark"}}
uv run python benchmark/run.py \
--hf-repo LiquidAI/LFM2.5-1.2B-Instruct-GGUF \
--hf-file LFM2.5-1.2B-Instruct-Q4_0.gguf \
--task 5
```
It is also worth running the benchmark against a frontier model like GPT-4o-mini to verify the agent harness is correct. If a state-of-the-art model does not pass almost everything, the problem is your code, not the model.
```bash theme={"theme":{"light":"github-light","dark":"github-dark"}}
uv run python benchmark/run.py --backend openai
```
Results are printed to the console and saved as a Markdown file in `benchmark/results/`.
### Baseline results
| Model | Parameters | Score | Accuracy |
| -------------------------- | ---------- | ------ | -------- |
| gpt-4o-mini | n/a | 93/100 | 93% |
| LFM2.5-1.2B-Instruct Q4\_0 | 1.2B | 71/100 | 71% |
| LFM2-350M Q8\_0 | 350M | 28/100 | 28% |
These are not vibes anymore. These are actual numbers we can use to understand where we stand and how much room there is to improve.
## Step 3: Generate synthetic data
To fine-tune the model you need labelled training data. We generate it synthetically using a strong model like `gpt-4o-mini`. The pipeline has four stages to avoid contaminating the training dataset with examples too close to the benchmark:
```mermaid theme={"theme":{"light":"github-light","dark":"github-dark"}}
flowchart LR
A["Generate candidates
That is fine for a proof of concept. But the full power of small language models only comes out when you fine-tune them. Before you fine-tune, though, you need to know where you stand. You need to measure.
### Building a good benchmark
A good benchmark covers the space of possible inputs by systematic taxonomy, not intuition. The `benchmark/` directory contains a 100-task suite built around three dimensions:
| Dimension | Values |
| --------------- | ----------------------------------------------------------------------------- |
| Capability | `lights`, `thermostat`, `doors`, `status`, `scene`, `rejection`, `multi_tool` |
| Phrasing | `imperative`, `colloquial`, `implicit`, `question` |
| Inference depth | `literal`, `semantic`, `boundary` |
The Cartesian product of those dimensions defines the universe of task types. At least one task is sampled per non-empty cell, forcing prompts you would not have thought of otherwise.
Every task has a pure Python verifier that inspects the final `home_state` dict or captured `tool_calls`. No LLM-as-judge. Deterministic, fast, cheap.
```python theme={"theme":{"light":"github-light","dark":"github-dark"}}
# State check: was the right final state reached?
passed = state["lights"]["kitchen"]["state"] == "on"
# Tool-call check (for status queries and rejections)
call = _find_last_call(tool_calls, "intent_unclear")
passed = call is not None and call["args"].get("reason") == "off_topic"
```
### Running the benchmark
```bash theme={"theme":{"light":"github-light","dark":"github-dark"}}
uv run python benchmark/run.py \
--hf-repo LiquidAI/LFM2.5-1.2B-Instruct-GGUF \
--hf-file LFM2.5-1.2B-Instruct-Q4_0.gguf
```
Run a single task by number (1-101):
```bash theme={"theme":{"light":"github-light","dark":"github-dark"}}
uv run python benchmark/run.py \
--hf-repo LiquidAI/LFM2.5-1.2B-Instruct-GGUF \
--hf-file LFM2.5-1.2B-Instruct-Q4_0.gguf \
--task 5
```
It is also worth running the benchmark against a frontier model like GPT-4o-mini to verify the agent harness is correct. If a state-of-the-art model does not pass almost everything, the problem is your code, not the model.
```bash theme={"theme":{"light":"github-light","dark":"github-dark"}}
uv run python benchmark/run.py --backend openai
```
Results are printed to the console and saved as a Markdown file in `benchmark/results/`.
### Baseline results
| Model | Parameters | Score | Accuracy |
| -------------------------- | ---------- | ------ | -------- |
| gpt-4o-mini | n/a | 93/100 | 93% |
| LFM2.5-1.2B-Instruct Q4\_0 | 1.2B | 71/100 | 71% |
| LFM2-350M Q8\_0 | 350M | 28/100 | 28% |
These are not vibes anymore. These are actual numbers we can use to understand where we stand and how much room there is to improve.
## Step 3: Generate synthetic data
To fine-tune the model you need labelled training data. We generate it synthetically using a strong model like `gpt-4o-mini`. The pipeline has four stages to avoid contaminating the training dataset with examples too close to the benchmark:
```mermaid theme={"theme":{"light":"github-light","dark":"github-dark"}}
flowchart LR
A["Generate candidates
(prompt includes benchmark blocklist)"]
A --> B{"Exact or substring
match with benchmark?"}
B -->|yes| R1((discard))
B -->|no| C{"Trigram Jaccard
similarity > 0.5?"}
C -->|yes| R2((discard))
C -->|no| D{"Agent cross-validation:
gpt-4o-mini agrees?"}
D -->|no| R3((discard))
D -->|yes| E[("sft_data.jsonl")]
```
1. **Blocklist in the prompt.** Every benchmark utterance is listed and the model is told not to reproduce them.
2. **Filter by exact or substring match.** Catches verbatim copies.
3. **Filter by trigram similarity.** Catches light paraphrases by measuring overlapping three-word chunks. Candidates with more than 50% overlap are discarded.
4. **Agent cross-validation.** Each surviving candidate is run through the real agent. Only examples where the agent produces the expected tool call are kept.
Generate 500 examples distributed across the benchmark taxonomy (requires `OPENAI_API_KEY` in `.env`):
```bash theme={"theme":{"light":"github-light","dark":"github-dark"}}
uv run python benchmark/datasets/generate.py --count 500 --output benchmark/datasets/sft_data.jsonl
```
Then convert the dataset to the LFM2 text format and push it to HuggingFace so Modal can pull it during training:
```bash theme={"theme":{"light":"github-light","dark":"github-dark"}}
uv run --group finetune python finetune/prepare_data.py \
--input benchmark/datasets/sft_data.jsonl
```
## Step 4: Fine-tune the model
Fine-tuning adapts the base model to our specific task. We use LoRA (Low-Rank Adaptation), which injects a small set of trainable weight matrices on top of the frozen base model. This keeps GPU memory usage low and training fast while still producing meaningful accuracy gains.
Training runs on [Modal](https://modal.com) (a serverless GPU cloud) via [leap-finetune](https://github.com/Liquid4All/leap-finetune), Liquid AI's open source fine-tuning tool.
```mermaid theme={"theme":{"light":"github-light","dark":"github-dark"}}
sequenceDiagram
participant Local as Local machine
participant Modal as Modal (H100)
participant Volume as Modal Volume
participant HF as HuggingFace Hub
Local->>Modal: submit training job (leap-finetune config.yaml)
Modal->>Modal: SFT + LoRA on H100
Modal->>Volume: save checkpoint
Local->>Volume: modal volume get
Volume-->>Local: LoRA checkpoint
Local->>Local: merge adapter + convert to GGUF (export.py)
Local->>HF: push GGUF
Local->>HF: download model (benchmark/run.py)
```
### Steps
**1. One-time setup.** Clone and install `leap-finetune`, then authenticate with HuggingFace and Modal.
```bash theme={"theme":{"light":"github-light","dark":"github-dark"}}
git clone https://github.com/Liquid4All/leap-finetune
cd leap-finetune && uv sync && cd -
huggingface-cli login
modal setup
```
**2. Kick off training on Modal.** Runs 5 epochs of LoRA SFT on an H100. Takes a few minutes and costs roughly \$1.50.
```bash theme={"theme":{"light":"github-light","dark":"github-dark"}}
cd leap-finetune
uv run leap-finetune ../finetune/configs/LFM2-350M.yaml
```
**3. Download the checkpoint** from the Modal Volume once training finishes.
```bash theme={"theme":{"light":"github-light","dark":"github-dark"}}
cd leap-finetune
uv run modal volume get leap-finetune /outputs/home-assistant-350M ../finetune/output/350M-lora
```
**4. Export.** Merges the LoRA adapter into the base model, converts to GGUF, and pushes to HuggingFace.
```bash theme={"theme":{"light":"github-light","dark":"github-dark"}}
uv run --group export python finetune/export.py \
--lora-path finetune/output/350M-lora \
--output-path finetune/output/350M-merged \
--push-to-hub \
--quant-type q8_0
```
Re-run the benchmark with the flags printed by the export step:
```bash theme={"theme":{"light":"github-light","dark":"github-dark"}}
uv run python benchmark/run.py \
--hf-repo /home-assistant-LFM2-350M-GGUF \
--hf-file LFM2-350M-q8_0.gguf
```
### Fine-tuned model results
Fine-tuning moved the score from **28 to 47 (+19 points)**. Here is the breakdown by capability:
| Capability | Baseline | Fine-tuned |
| ----------- | -------- | ---------- |
| lights | 25.0% | 87.5% |
| scene | 0.0% | 80.0% |
| doors | 56.2% | 56.2% |
| multi\_tool | 8.3% | 33.3% |
| status | 0.0% | 30.0% |
| thermostat | 0.0% | 18.8% |
| rejection | 0.0% | 0.0% |
Rejection is the only category that did not improve. These tasks require the model to call `intent_unclear` instead of acting, which is harder than it sounds. Consider examples like "Dim the living room lights to 30%" (brightness not supported) or "Turn it on" (no target device specified). The training set had too few rejection examples. You can fix this by generating a rejection-heavy dataset and fine-tuning again:
```bash theme={"theme":{"light":"github-light","dark":"github-dark"}}
uv run python benchmark/datasets/generate.py --count 500 \
--capability-weights rejection=5
```
## Step 5: Deploy the fine-tuned model
The fine-tuned GGUF is already registered in `app/server.py` as `LFM2-350M fine-tuned Q8_0`.
**1. Start the server:**
```bash theme={"theme":{"light":"github-light","dark":"github-dark"}}
uv run uvicorn app.server:app --port 5173 --reload
```
**2. Open the app:**
```bash theme={"theme":{"light":"github-light","dark":"github-dark"}}
open http://localhost:5173
```
**3.** Select **LFM2-350M fine-tuned Q8\_0** from the model dropdown. The app downloads the model from HuggingFace and starts `llama-server` automatically.
If you pushed your own fine-tuned model in Step 4, register it by adding an entry to `LOCAL_MODELS` in `app/server.py`:
```python theme={"theme":{"light":"github-light","dark":"github-dark"}}
{
"id": "my-ft-model",
"name": "My fine-tuned model",
"hf_repo": "/home-assistant-LFM2-350M-GGUF",
"hf_file": "LFM2-350M-q8_0.gguf",
"size_label": "~370 MB",
},
```
Restart the server and select your model from the dropdown.
## What's next?
In this example we showed how to go from a working prototype to a fine-tuned local assistant with measurable accuracy gains.
The model learned well across most capability areas. Lights went from 25% to 87.5%, on par with GPT-4o-mini. Scene went from 0% to 80%. The remaining gap is in rejection tasks, which is a data problem. Generate more rejection examples with `--capability-weights rejection=5` and fine-tune again to close that gap.
To improve results further you can:
* Increase the synthetic dataset size beyond 500 examples.
* Add more rejection examples using `--capability-weights rejection=5`.
* Extend the tool set and regenerate training data to cover new capabilities.
## Need help?
Connect with the community and ask questions about this example.